![]()
-
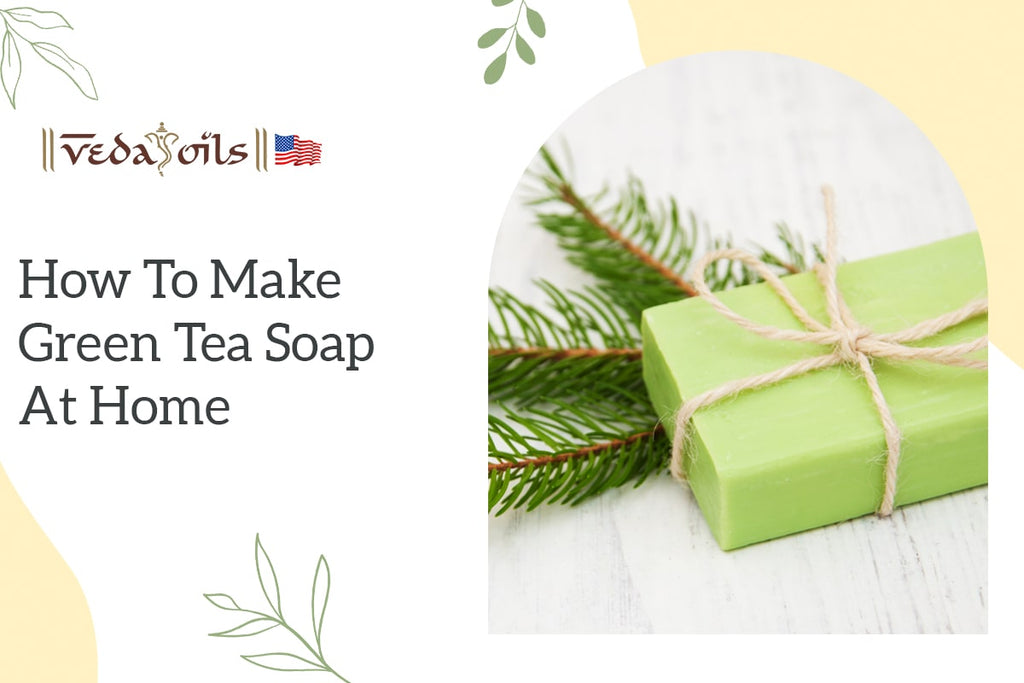
How to Make Green Tea Soap at Home | Benefits & Uses for Skin
If we told you there is a single substance that can address the majority of skin-related issues, would you believe us? You might not know it, but there is something called green tea, and how should you use it? It's packaged as soap.
Antioxidants, amino acids, enzymes, and polyphenols are all abundant in green tea. B vitamins, manganese, folate, magnesium, and, of course, caffeine is also present.
Read on to see how this one ingredient may be adapted into a variety of formulas to suit your needs and time to reduce acne, counteract the effects of aging, and provide clean, germ-free skin. Let’s make green tea soap for daily use.
Benefits of Green Tea Soap for Skin
Green tea is a natural skin detoxifier, and using green tea soap is the finest and simplest method to include it into your daily routine. Let's examine the green tea soap benefits for skin.
- Helps With Dark Circles And Puffy Eyes
Caffeine and tannins, the two major components of green tea, can help lessen puffiness and dark circles. In particular, caffeine and tannins aid in blood vessel contraction, hence lowering swelling, while vitamin K aids in lightening the dark hue.
Antioxidants and polyphenols included in green tea are believed to slow down the aging process by scavenging free radicals, which hasten the appearance of aging symptoms. Having said that, green tea can also help with fine lines and wrinkles, as well as give the skin a glowing, healthy appearance.
Another advantage of green tea is that it includes the anti-adrenergic component ECGC, which controls oil production and improves skin by lowering the quantity of oil on the skin.
- Green Tea Prevents Skin Irritation
The anti-inflammatory qualities of green tea assist to lessen swelling, redness, and irritation of the skin. In the affected areas, you can apply green tea extracts or products containing green tea. Additionally, it soothes the skin while hydrating it.
- Green Tea Helps In Maintaining Skin Health
Vitamins E and B2 included in green tea support the maintenance of healthy skin. While vitamin E promotes the creation of new skin cells and softens and illuminates the skin, vitamin B2 keeps the skin firm and youthful.
Ingredients Required to Make Homemade Green Tea Soap
- Melt And Pour Soap Base - 4 Ounce / 115 Grams
- Green Tea Extract - 1/2 Tablespoon / 2.5 Grams/ 0.08 Ounce
- Matcha Powder - 1/4 Tablespoon / 0.5 Gram / 0.02 Ounce
-
Essential Oils - Up To 30 Drops / 1 Gram / 0.03 Ounce (Different Essential Oils combination for different benefits and applications are available below.)
- Jasmine-Vanilla Mix:- 18 Drops Jasmine + 8 Drops Rhododendron + 4 Drops Vanilla
- Refreshing Mix:- 15 Drops Lemongrass + 9 Drops Steam-Distilled Lime + 6 Drops Steam-Distilled Lemon.
- Skin Care Mix:- 13 Drops Blue Yarrow + 10 Drops Palmarosa + 7 Drops Cedarwood
Let’s Know The Ingredients
As a result, we have explained why and what function each component serves in this green tea soap recipe. First, knowing about the ingredients improves your understanding of how you can utilize them.
The term "melt and pour soap base" conveys what it is. This implies that it is a ready-to-use soap; all you have to do is personalize the mixture with your preferred colors and perfumes. The addition of essential oils only improves the quality and efficacy of this soap as a skin-care product.
Sebum balancing, skin protection, and prevention of early skin aging are among claimed benefits of green tea. An abundant source of antioxidants is green tea. These organic substances combat free radicals and lessen aging symptoms including hyperpigmentation and fine wrinkles.
Matcha is equally as high in antioxidants as green tea, which aid in defending the skin against free radicals. Additionally, it has potent anti-inflammatory properties that can soothe skin irritations. When they cooperate, soap's ability to care for skin is improved.
We utilize essential oils in soap primarily for their lovely aroma. We can also choose essential oils made from organically cultivated herbs and flowers because it is plant-based and vegan-friendly. Numerous anti-bacterial, anti-microbial, anti-viral, and anti-fungal characteristics are also present in it.
Easy Steps to Make Green Tea Soap at Home: DIY Recipes
Do you feel apprehensive about manufacturing soap at home? It shouldn't! You can quickly create stunning DIY green tea soap by following these easy steps.
Step 1: Melt the soap base
- Cut the melt-and-pour soap base into cubes measuring 0.5 in./ 1 cm.
- Place the soap cubes in a glass measuring cup and microwave for increments of 30 seconds at a time until completely liquid.
- Avoid overheating, and stir in between heatings.
Step 2: Add actives and scent
- Allow the soap to cool for about three minutes. It's vital to let the soap cool completely before adding the green tea extract because it's heat-sensitive.
- After the soap has cooled, gradually include the matcha powder and green tea extract until well blended.
- Swirl in whatever colorant you're using at this point, such as green chrome oxide or mica.
Step 3: Cast soap
- Place the soap mold on a plate or cutting board. The soap is now simpler to move around and raise.
- Pour the soap mixture into the mold with caution.
- To remove bubbles, you might spritz the top with alcohol. If the bubbles don't annoy you, you are welcome to skip this step.
Step 4: Allow setting
- For about an hour at room temperature or 30 minutes in the refrigerator, let the soap cool and solidify.
- Gently touch the soap with your finger to see if it is ready. You're good to go if it feels solid. If there is softness, the soap needs to cool more.
Step 5: Unmold
- To release the airlock after the silicone mold has fully set, carefully remove it from the soap.
- Unmold your green tea soap bar carefully after that. The matcha soap is prepared.
Step 6: Store
- Glycerin, a humectant that pulls moisture from the air, can be found in melt and pour soap. On the soap's surface, this moisture may cause tiny beads to develop. This result is known as glycerin dew.
- Wrap the soap tightly in plastic wrap or cling film if you won't be using it straight away to prevent glycerin dew.
Tips And Tricks
Although it's quite easy to produce this green tea soap at home, following these six instructions will always result in lovely, aromatic green tea soap bars.
- To ensure that the soap melts fast and doesn't become too hot, cut it into little cubes.
- Watch your soap carefully while it melts in the microwave. Particularly goat's milk soap is prone to spilling over and burning.
- Before incorporating your actives, let the soap cool. Since green tea extract is heat-sensitive, adding it to hot soap would negate its skincare benefits.
- When incorporating the ingredients, stir the soap slowly. An excessive amount of mixing will aerate the soap and produce bubbles.
- Reheat the soap mixture in the microwave for 15 to 20 seconds if it solidifies too soon. You can reheat melt-and-pour soap numerous times.
- Increase the nutrition. To make a more moisturizing green tea soap for dry skin, stir 1/4 tsp shea butter into the heated soap base until it melts.
Other Ways to Use Green Tea for a Healthier Skin
Green tea is well known for its many uses and advantages, particularly in cosmetic procedures. So, in this section of the post, we'll discuss several more at-home methods for using green tea to promote healthier skin in addition to soap making.
How to use it as a cleanser is as follows: Use 1 spoonful of honey and 2 tablespoons of green tea infusion. It has been thoroughly combined. Apply it to your neck's skin, coating it. Next, give your face and neck a 2-minute massage with it before rinsing with water.
How to utilize it as a scrub is as follows: Add a teaspoon of loose leaf green tea or the contents of a tea bag to an equivalent quantity of your go-to face wash for a fantastic face scrub. Stir thoroughly, wet the face and neck, gently apply the face scrub all over, and then rotate in a clockwise motion until the skin is thoroughly cleansed. Rinse off well, then dab dry.
How to utilize it as a toner is as follows: Set aside around 100 ccs of the freshly made and cooled green tea, then cover your face with it by dipping some cotton wool in it. You may use this toner both in the morning and at night, making it one of the most powerful toners you can find.
How to apply it for cracked lips is as follows: Apply a green tea bag that has been soaked in warm water over the lips for a few minutes to reduce the sting of dry and chapped lips. Your lips will feel hydrated like never before.
- As Face Packs And Face Masks
How to apply it as a face mask is as follows: Yogurt, milk, honey, and several other items can all be combined with green tea powder to make beneficial face packs. Prepare 50ml of green tea, then chill for an hour. The cooled tea should be combined thoroughly with four teaspoons of palm sugar until the mixture thickens. If you have dry skin, you can mix in a teaspoon of olive oil. With this mask, exfoliate your face in broad upward strokes. Use twice weekly for ideal outcomes.
Takeaway
Many people believe that green tea, which is high in antioxidants and nutrients, can help with several health problems. Additionally, using it frequently is made simple by green tea soap. Green tea and green tea extract have the potential to help prevent melanoma and nonmelanoma skin cancers in addition to aiding with acne and making your skin look younger. Which will you pick: artificial products that could injure you even more or an organic ingredient that offers natural skincare?
Vedaoils introduced its new green tea liquid extract and green tea powder to enhance the standard and simplicity of your recipes. Vedaoils are renowned for their purity and provide the greatest organic ingredients at the most competitive prices. Check us out at vedaoils to see for yourself.
FAQ's
Q: What Is Green Tea Soap Good For?
Ans: It has cleansing and antioxidant properties. Additionally, it soothes sunburn and prevents the appearance of wrinkles, dark spots, and other aging symptoms. There is a soap that is suitable for all skin types.
Q: Is Green Tea Soap Good For Dry Skin?
Ans: Green tea effectively manages oil while avoiding dryness on skin that is both oily and dry.
Q: What Is Green Tea Soap?
Ans: A crucial component of your daily washing practice should be using green tea soap because it has antibacterial and skin-beautifying effects. The sweet-smelling, antioxidant-rich green tea soap will make your skin softer, smoother, and more radiant.
Q: Is Green Tea Good For The Skin?
Ans: The anti-inflammatory effects of green tea can help lessen swelling, redness, and irritation of the skin. Green tea can also be used to treat sunburns and minor wounds. Studies have discovered that topical green tea is an effective treatment for numerous dermatological diseases because of its anti-inflammatory qualities.
You May Also Like
![]()
-
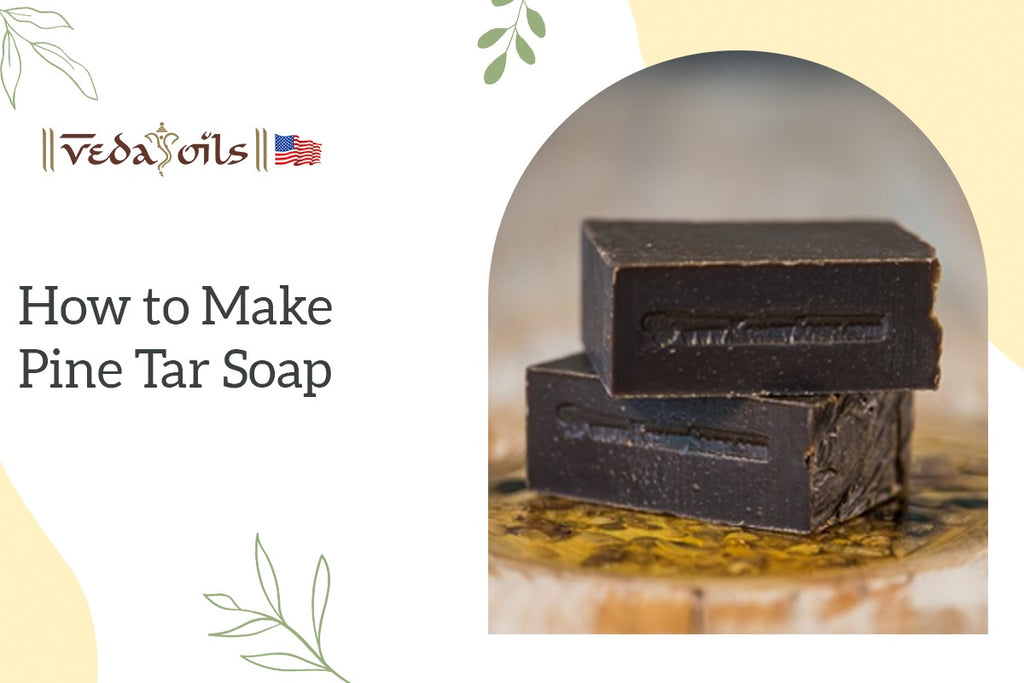
How to Make Pine Tar Soap at Home: Simple Steps
How to Make Pine Tar Soap at Home: The time is gone when a person was completely dependent on the market to buy products of one’s choice. DIY recipes have become quite popular from past years where people can even create their own skincare products too. Natural products have enormous benefits on all skin types and are proven to be very easy to make.
All you require are some natural ingredients suiting your skin type and desire. You must have tried your hand on creating a soap for yourself. But have you ever tried making Pine Tar soap at home? It is one such a beautiful and amazing soap to use on skin. Lets know more about how to make pine tar soap at home below in the blog.

Why Pine Tar Soap is a Healthier Option for your Skin: Benefits
Pine Tar soap is a way healthier option for your skin than any other soap. The soap is said to have anti-fungal qualities that are useful to soothe skin. The soap is antibacterial and treats symptoms of poison ivy, sumac and oak.
The Pine Tar soap is used to treat skin conditions such as eczema, acne and psoriasis. The soap relieves itching caused by bug bites.
Pine Tar soap has therapeutic benefits that help in getting rid of rashes caused by various skin damages. The soap has healing inflammations caused by poison ivy, sunburn and insect bites.
In addition to this, Pine Tar soap is anti-inflammatory and anti-fungal in nature. The soap is suitable to treat dry, itchy or inflamed skin conditions very well.
How to Make Pine Tar Soap at Home: DIY Recipe
The DIY recipe of creating Pine Tar soap is very easy and involves natural ingredients. Below there is a detailed recipe along with ingredients that are required in the process.
Ingredients-
- Distilled Water
- 4.20 oz Iye
- 1 tablespoon of sodium lactate
- 2 tablespoons of pine tar
- 2 tablespoons of olive oil
- 1 tablespoon of castor oil
- 2 tablespoons of coconut oil
Recipe-
1- Simply add the Iye to the distilled water. The mixture of the two will get hot very quickly so make sure to wear safety measures. The fumes will be strong until the mixture cools down.
2- Allow the mixture of the two to cool down for at least 45 minutes to one hour if not that longer. Once the mixture cools down, add the sodium lactate and stir it well.
3- Then, prepare the oils by measuring them on the scale and melt the coconut oil. Combine all the oils together and add pine tar as well in the bowl. Set the mixture aside and mix it thoroughly with the Iye mixture. Keep the mixture at a cool place.
4- Once the mixture cools, then stir it well with a heavy duty plastic spoon. The soap batter should thicken within 3-4 minutes.
5- Pour the thickened soap batter into any mold of your choice. Simply, place the molds for the next 24-48 hours into a closet. After some time, remove the soap from the mold.
6- Slice into bars and then allow the soap to cure for next 4-6 weeks.
Different Between Coal Tar Soap and Pine Tar Soap
Pine Tar soap is made from pine tree resins and has a very strong smell of pine scent. The soap is used by many to treat psoriasis. On the other hand, Coal Tar soap is made purely by coal when it is distilled.
Pine Tar soap has been used by people for more than hundred years.
Whereas, Coal Tar soap is recently becoming popular for its benefits.
Pine Tar soap exerts its effects by reducing DNA synthesis and is completely natural. The soap is anti-inflammatory, anti-fungal, antipruritic in nature. These properties of Pine Tar soap makes it best for topical treatment of skin conditions such as eczema, psoriasis, dermatitis and other dry, itchy or flaky inflamed skin problems.
On the other hand, Coal Tar soap is used widely to treat skin conditions such as psoriasis and eczema. The soap reduces inflammation, scaling and itching on the skin. The soap has a very strong smell of coal due to which it is often not recommended by dermatologists for use.
Both the soaps are very good for skincare but due to a bit of unpleasant smell of coal tar soap, doctors recommend Pine Tar soap over Coal one. Pine Tar soap has a lot of benefits for the skin and its recipes are very simple to create at home. All you require for the recipe of Pine Tar soap, are some natural ingredients and oils that would be suitable to all skin types without any side effects.
Takeaway
Pine tar soap is a nourishing soap that has enormous skincare benefits. The soap is very different from usual soaps that you would have used. Pine tar in itself helps to make the soap good to get rid of skin conditions. It is an antibacterial soap which just simply makes your skin glowy and healthy. In this blog you will get in-depth knowledge of how to make pine tar soap at home.
VedaOils US is a wonderful brand that has an enormous variety of essential oils. The oils are of top quality and do not harm the skin at all. The brand is the best stop to buy essential oils for Pine Tar soap and works very well on all skin types.
FAQs-
Q: Are essential oils safe for the skin?
A. Yes, essential oils are absolutely safe and have no side effects. You may use them to make pine tar soap at home easily.
Q: Is the recipe for Pine Tar soap easier?
A. Yes, in just a few easy steps you can create Pine Tar soap at home.
Q: Is Pine Tar beneficial to the skin?
A. Yes, absolutely the Pine Tar soap is beneficial to the skin in all types. Pine Tar soap has therapeutic benefits that help in getting rid of rashes caused by various skin damages. The soap has healing inflammation and improves skin’s quality.
You May Also Like:-
![]()
-
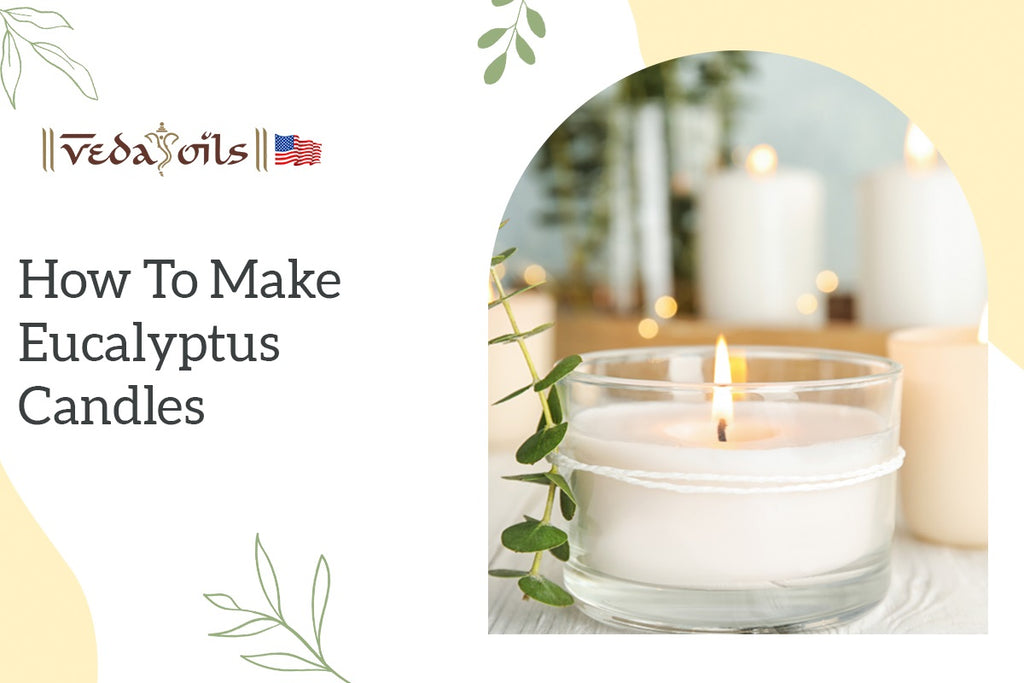
How to Make Eucalyptus Candles at Home: DIY Recipe
Aromatherapy benefits can be obtained through aroma candles, which are manufactured using essential oils. In other words, aromatherapy candles are created to promote the health of the body, mind, and soul through comprehensive therapeutic care. One such candle is the eucalyptus candles for aromatherapy, a remedy used for millennia to improve mood, reduce stress, sharpen focus, and manage pain.
Eucalyptus essential oil scents are released to awaken the senses. even reduce systolic blood pressure with certain aromas. In general, aroma candles are utilized for their pleasant scents as well as for their capacity to lift our spirits and make us feel good.
According to research, aromatherapy can change or get rid of the unfavorable feelings we associate with particular circumstances. We have a strong relationship between our emotions and our sense of smell. As a result, when you inhale an aromatic candle, a powerful interaction between your sense of smell and brain is activated, one that has the potential to improve both your health and your mood.

Prime Benefits of Eucalyptus Candles
Through your sense of smell, eucalyptus oil molecules can alter your psychological state of being in addition to inducing bodily reactions. The respiratory system is linked to the advantages provided by eucalyptus candles.
- Since eucalyptus essential oil has many antiviral effects, using eucalyptus essential oil candles can help people feel less congested and cough less by opening up their sinuses.
- The eucalyptus essential oil used in the candles boosts general immunity and protects against microorganisms that cause allergic reactions.
- Eucalyptus essential oil is used to make candles that purify the air and ease respiratory problems.
- These eucalyptus-infused candles are supposed to be beneficial for sinusitis infections.
- Eucalyptus essential oil candles help ease headaches, especially those brought on by sinus congestion.
- Burning a candle composed of essential oils, such as eucalyptus, will frequently relieve sore throats brought on by sinusitis and colds.
- The senses are stimulated by eucalyptus essential oil. It is used by holistic healers for a variety of conditions and illnesses.
Different Eucalyptus Candle-Making Supplies
Let's listen to the stories behind each and every component in this recipe to learn how they affect or improve our candle.
Natural fragrances and scented eucalyptus candles can be made with eucalyptus essential oil because of its crisp, clean scent. You can diffuse eucalyptus essential oil if you feel exhausted and dehydrated after a long day of activity. Reviving your body and spirit will help you unwind quickly.
A head-proof container called a canning jar will serve as both our wax container and the vessel for a chic candle we'll use to decorate our houses. This candle jar is made entirely of natural materials and is eco-friendly.
Compared to paraffin wax, soy wax has a lower melting point. Soy wax candles will therefore burn more slowly and last longer than paraffin candles. You may savor delectable scents for a lot longer thanks to a longer candle life. The wax pool that surrounds the wick of a candle releases fragrance into the atmosphere.
We can match our candle to the eucalyptus motif using this natural hue, but you can choose whatever color you choose to give your candle a unique flair and a sophisticated appearance.
Additionally, candle wicks have a propensity to burn unevenly, leaving wax sticking to the jar's sides while the middle burns down. You may get the most use out of your candle by using wooden wicks, which evenly heat your wax. Our wood candle wicks burn evenly on all sides, providing you with a soot-free, clean burn.
The wick in the middle will be held by chopsticks or pencils, which is crucial for a nice aroma throw and a steady flame.
Step by Step Guide to Make Eucalyptus Candles at Home
Many things may be done with a candle, so we have offered simple and easy-to-follow recipes for the beginning. Keep at it; practice makes perfect in this skill. Try making this wonderful eucalyptus candles at home to gain experience with making candles.
Ingredients And Quantity
Canning Jars - 16 Ounce
Soy Candle Flakes - 2 1/2 Cups
Green Pigment Powder - 1 Tablespoon
Candle Wick - 6-Inch Or More
Pencil Or Chopstick
Eucalyptus Essential Oil - 10-15 Drops
Recipe
- In a Teflon pan, start by heating the soy flakes over medium heat. To prevent sticking or clumping, keep the flakes moving.
- Reduce the heat after the flakes have dissolved, then add the green pigment. Stirring continuously will help the color spread. Discard after removing from heat. Drops of eucalyptus essential oil can now be added while stirring.
- Now secure the wick's ends to a pencil or chopstick. Use the stick to secure the wick at the top while letting the weight fall to the jar's bottom.
- Melted soy flakes should be added gradually to the container. You want it to stay in the middle, so adjust the wick if necessary. It will appear to be a wick soaking in Ecto Cooler right now!
- Try these easy Lavender and Rosemary Crock Pot Candles if you're seeking another fantastic essential oil candle recipe.
- Place the jar somewhere cool where it will have time to harden. This will take four hours on average.
- Before these four hours, don't disturb it. Although the candle may appear solid, its interior may still be mushy. Do not handle it by caressing, shaking, or fussing.
- Now that the wick is about 1/2 inch long, you can trim it with scissors. It can now be lit and naturally appreciated.
More Essential Oils Combination for Scented Candles
Being surrounded by essential oils throughout the day can be fantastic for bringing freshness to the air or calming down during a busy time. But let's face it, a good diffuser is pricey, and chances are your kids will smash it.
While using essential oils to create your aromatherapy eucalyptus candles is the ideal way to disperse the fragrance without having to worry about the plug-in breaking or the diffuser tipping over and the priceless oils leaking out, it's important to keep in mind how expensive essential oils for candles are.
You'll find a recipe for making candles with essential oils below. These are a great weekend craft for the whole family and make lovely gifts.
Some of the top fragrance oils for candles are listed below:
Takeaway
Making candles with eucalyptus essential oil is a great idea because it is a beautiful substance with many applications. What will you do now that you are fully informed on how to produce eucalyptus candles and their advantages? You might be wondering where to find the best eucalyptus candle-making supplies.
Don't worry; just visit us at us.VedaOils.com to join our family and receive incredible savings on every transaction. If you have any questions, continue reading.
FAQ
Q: What does a eucalyptus candle do for you?
A. A purifying, sanitizing, and clarifying essential oil, eucalyptus helps enhance the quality of the air. The air can be refreshed and purified by burning a eucalyptus candle. The oil is also considered to be good for the respiratory system and to relieve headaches, blocked airways, and breathing issues.
Q: Are Eucalyptus Candles good for colds?
A. Eucalyptus essential oils have been demonstrated to relieve cold symptoms in addition to their relaxing properties. It can relieve nasal congestion and coughing.
Q: What are Eucalyptus and mint candles good for?
A. Eucalyptus: With a fresh, energizing scent, eucalyptus relieves congestion in the nose and treats allergies, colds, and sinusitis. It is also emitted to create energy. Everyone is familiar with the scent of peppermint, which may be used in candles to treat stomach issues, migraines, and muscle discomfort.
Q: Is Eucalyptus safe to breathe?
A. In addition to lowering mucus, the oil's reaction with mucous membranes helps to release it so that you can cough it up. Eucalyptus may also inhibit the symptoms of asthma. On the other hand, it might make asthma symptoms worse for those who are allergic to eucalyptus.
You May Also Like:-
![]()
-
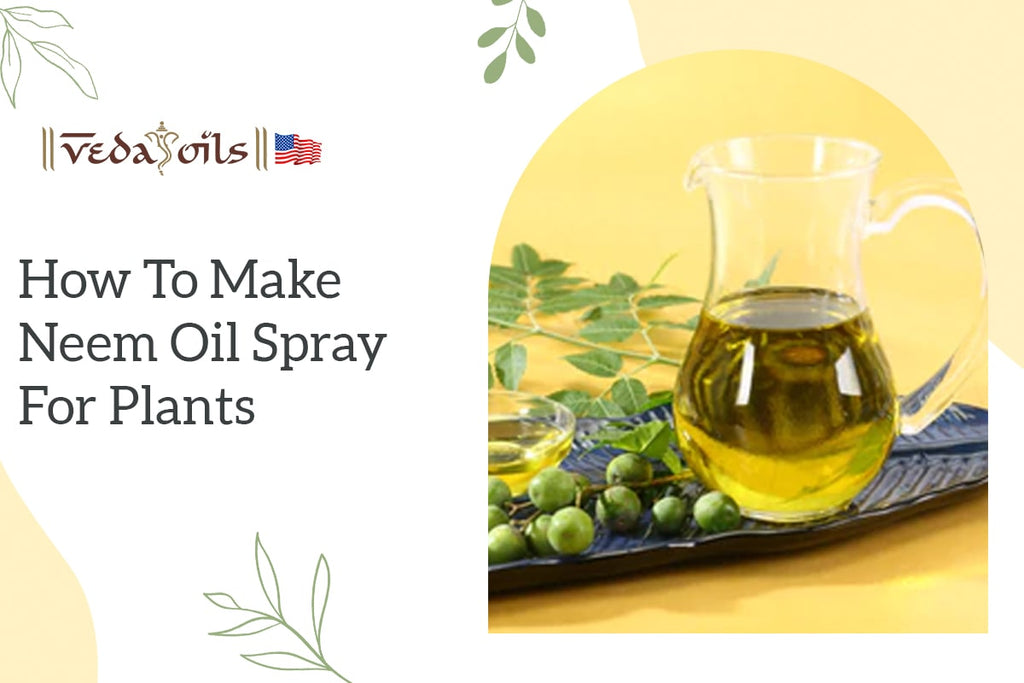
How to Make Neem Oil Spray for Plants
How to Make Neem Oil Spray for Plants at Home: We've learned the drawbacks of employing synthetic pesticides over time. Neem oil is an environmentally friendly solution to getting rid of a variety of garden pests on both indoor and outdoor plants. The secret, though, is to utilize neem oil properly. It can harm certain plants if not applied properly.
Market neem oil solutions are available, but they are likely to be less strong and effective than handmade alternatives. In this blog, we'll show you how to make neem oil spray for plants at home to protect them from insects and pests.
How to Make Neem Oil Spray for Plants at Home
Making neem oil spray for plants at home is simple; this recipe is 100% organic and beneficial for your plants, so it won't harm them. Let's have a look at how to make neem oil spray for plants at home.
Ingredients
- Water - One Gallon
- Concentrated, Cold-Pressed Neem Oil - 1 Tablespoon
- Liquid Soap - 1 Teaspoon Or Pre-Wetted Silica Powder - 1 Teaspoon
- Optional: Aloe Vera Powder - 1/8 To 1/4 Teaspoon
- Essential Oils - 20 Drops Total
Recipe
- It's easiest to pre-mix a portion of silica powder with water and store it as a liquid solution if you plan to use neem and silica powder on a regular basis. It's ready to use and may be mixed with neem anytime you need it. Combine 35 grams of silica powder with 8 ounces of water to achieve this. Mix thoroughly and keep for up to a year in a cold, dark location, enough for 48 one-gallon batches of neem oil spray!
- Fill your pump sprayer halfway with water, about a pint short of a gallon. Scale up or down as appropriate, depending on how many and how huge the plants are. With time, you'll find your stride. Add ⅛ to ¼ teaspoons of aloe vera powder to your gallon of water now if you wish to use it in your foliar spray. Shake the sprayer carefully before using it.
- The neem oil must then be emulsified. Combine 1 tablespoon of neem oil with 1 teaspoon of liquid soap or 1 teaspoon of the pre-made liquid silica solution described above in a small container, such as a half-pint jar or small beaker. To blend, thoroughly stir everything together. This should result in a thick, creamy yellow liquid.
- Fill a clean quart jar with warm water to about three-quarters full. It is vital to use warm, but not boiling, water to aid in mixing. Pour your neem soap/silica solution in now. Fill the jar halfway with water and shake it violently. Oil droplets will not form on the surface if it is fully blended. Neem oil has now been emulsified!
- To make the final diluted combination, combine the warm quart of neem solution with the water already in your sprayer. To mix, close the bottle and shake it vigorously.
Adding Essential Oils (Optional)
- Essential oils can be employed in the same way that peppermint and neem scents are unpleasant to pests and thus deter them. Essential oils are highly concentrated liquids. If you want a little extra protection, consider adding a few drops to the recipe above. 10-20 drops per gallon of water are plenty.
- Essential oils that function as natural insect repellents include peppermint, lavender, orange, tea tree, and eucalyptus, among many more.
Uses of Neem Oil Spray in Garden
Neem oil is primarily known for its effectiveness as a pesticide. There's a lot more to this incredible oil, and here's how to get the most out of it.
- Neem Oil as a Foliar Spray
Neem oil can be used to kill insects at different phases of their life cycle. This makes it an excellent option for use throughout the year.
During the growing season, you could use it as a foliar application to manage common pests. Predatory insects, aphids, and flea beetles are examples.
Neem oil could also be used to get rid of hibernating bugs and eggs on your plants during the dormant season.
Neem cake is formed from organic manure and is a byproduct of cold-pressed neem kernels and fruit. The cake's unique feature is that it may be used as both a fertilizer and an insecticide.
Neem cake can help fertilize the soil by increasing nitrogen availability. White ants, nematodes, and grubs are all controlled using this product.
How To Use Neem Oil To Kill Bugs On Plants
Neem oil spray is quite easy to use in neutralizing Insects that can be a real pain in the garden. The use of neem oil spray is essential. Neem oil spray with its insect repellent properties not only removes insects and pests from your garden but also prevents any further infection. We have provided a few ways to use neem oil to kill bugs in plants.
- Several bugs live on the underparts of the leaves. Using the spray, thoroughly moisten both surfaces of the leaves.
- Apply the neem oil spray in the morning or evening. Spraying the plants in the afternoon and when the heat is above 80F is not recommended.
- To be able to kill an insect, the oil must have an opportunity to come into touch with it. Spraying should be avoided when rain is imminent.
- After 40 minutes of mixing with the water and soap, the efficiency of the neem oil mixture will diminish. When you're done spraying, discard the remaining oil spray mixture.
- Make sure the spray bottle or nozzle is clean before storing it. The nozzle may become clogged as the neem oil residue dries.
- Begin with the recipe listed above. If no improvement is shown after a few applications, boost the neem oil dosage to 1.5 times.
- As a pesticide, spray neem Oil every 7 days until the pests are gone to control an infestation. Getting rid of the pests fully takes time. Be patient and repeat the process every seven days. Here, consistency is crucial!
- Spray as a prophylactic measure: Be proactive in spraying the neem oil spray to your plants to prevent pest assaults. At 14-day intervals, treat the plants with neem oil spray. Summer days with excessive temperatures should be avoided.
When to Use Neem Oil?
Do the leaves of your squash or eggplant have holes in them? Do you notice any little insects on your tomato plants in the garden? Or are you bothered by the fungus gnats buzzing around your indoor seedlings? Use neem oil spray on the afflicted plants if you answered yes to any of the inquiries or to control any insects that threaten your vegetable garden.
Conclusion
In the end, what counts most is utilizing organic insecticides for healthy plants, and the finest neem oil spray for plants is made with organic and appropriate chemicals. For decades, vedaoils has provided the highest quality organic component for neem oil spray all over the world. Read the whole article to get to know about how to make neem oil spray for plants at home.
FAQ
Q: How long does homemade neem oil spray last?
Neem oil has a shelf life of 1-3 years if kept in a cool, dry environment. When mixed with water and an emulsifier to make an insecticidal spray, neem oil maintains peak activity for only a few hours but can last up to 3-4 days before its chemical constituents break down completely.
Q: What happens if you use too much neem oil on plants?
If you apply neem oil to plants many times a week, you can overdo it. If you haven't reduced the neem oil before usage, you may use too much. If you apply too much neem oil to your leaves, it will burn them, turn them yellow, and sometimes even kill pollinators.
Q: How often can you spray neem oil on plants?
In general, neem oil is only used to get rid of infestations. However, you can use it every 2 to 3 weeks as a preventive.
You May Also Like
![]()
-
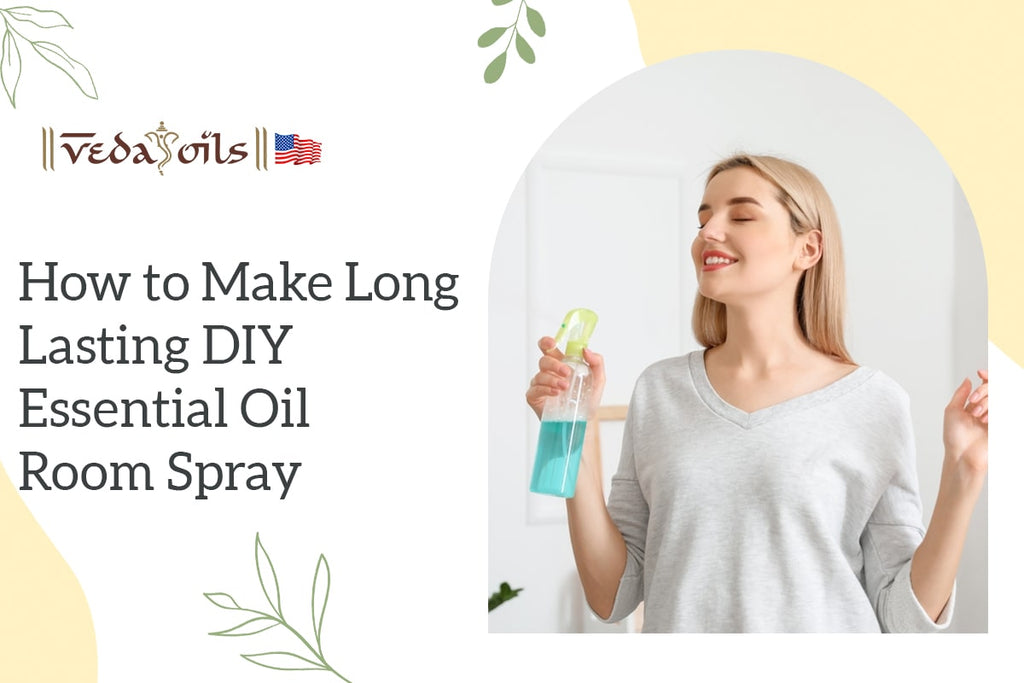
How to Make Long-Lasting DIY Essential Oil Room Spray
The time we’re living in has made things so much easier for us to execute. Such times are gone when people used to rely completely on heavy chemically made products for their well-being. The time is such which has made people work on products themselves that they wish to buy. DIY recipes have made it quite easier for people to follow simple recipes in making and create their own products at home.
Natural products such as essential oils are very effective and can be used to make vegan products at home easily. The essential oil room spray is one such beautiful creation that helps in cleansing the air and aura on the premises it has been sprayed at. Let us know more about essential oils room spray DIYs below in the blog.
What Essential Oils Make a Room Smell Good?
Tea tree essential oil is a very popular oil amongst people for various reasons. The oil is safe for use on any skin type and is antibacterial. The oil can be used as a room spray at home because of its amazing aroma. The fragrance of the oil helps to relax the mind and creates a magical aura of calmness all around the premises. The oil can be blended with other oils in a diffuser and spreads a wonderful fragrance of positivity as a room spray.
Lavender essential oil has a mesmerizing aroma to it. The oil has a wonderful flowery fragrance and is versatile in nature. The oil is unmatchable in its properties and completely safe for all skin types. The mood-enhancing property of the oil boosts enormous positive feelings and combat anxiety issues. The lavender room spray reduces stress and tiredness. Enjoy a relaxing time at your premises with amazing lavender room spray.
Lemon essential oil prevents anger and stress from within. It has a really attractive smell that promotes a positive mood and uplifts the environment’s overall aura. The lemon oil energies mood and exhibits calmness. The fragrance of the oil when used as a room spray calms angry moods and stabilizes energy. The scent of the oil uplifts positivity in both mind and body. The room spray alleviates negative thoughts and spread good vibes all around.
-
Ylang-Ylang Essential Oil
Ylang ylang essential oil room spray has a sweet and flowery fragrance that has made it one of the favorites of users so far. The oil enhances the positive aura all around the premises. The room spray sets the tone of pleasant sleep and total relaxation of the body. The oil is antibacterial and removes all the impurities from the aura. It is a must-have so do try this room spray today.
Jasmine essential oil is one of the favorite oil for a room spray. The sweet scent of the jasmine flower simply enhances the positive feelings amongst people. The floral aroma of the room spray boosts mood and promotes the overall feeling of positivity. The oil calms the mind and promotes good sleep. The room spray affects mental, emotional, and physical health which leaves the room smelling amazing.
Why DIY Essential Oil Room Spray is Better?
The DIY essential oil room spray is better as it is completely free from harsh chemicals. It is made of natural ingredients such as essential oils that make them a safer option to be used at home. The sprays are allergic free and safer for the people living on the premises. The essential oil room spray helps in eliminating the smell and leaves a clean and fresh scent all around. The sprays cleanse the air and their scent lasts longer.
How To Make an Essential Oil Room Spray
DIYs for making an essential oil room spray help a lot in creating products that would cleanse the air and exhibit positive vibes all around. The essential oils’ sprays are very effective in killing the germs and impurities in the air and are best used at home. Let us check out the recipes below to know the steps of creating your own essential oil spray easily.
Recipe 1
Ingredients Required:-
- 3 drops of ylang-ylang essential oil
- 3 drops of jasmine essential oil
- 2-3 drops of sweet almond oil
- ½ cup of distilled water
- 1 spray bottle
Directions
In a bowl, at first mix all the essential oils such as ylang-ylang and jasmine with carrier oil sweet almond. After mixing these two, add ½ cup of distilled water. Transfer the mixture into a spray bottle. Remember to shake the room spray bottle well before use.
How to use
Simply, shake the spray bottle before use. Spray the essential oils around your premises at least twice a day for better results.
Recipe 2
Ingredients Required:-
- 3 drops of lemon essential oil
- 3 drops of tea tree essential oil
- 2-3 drops of coconut oil
- ½ cup of distilled water
- 1 spray bottle
Directions
In a bowl, at first mix all the essential oils such as lemon and tea tree with carrier oil coconut oil. After mixing these two, add ½ cup of distilled water. Transfer the mixture into a spray bottle. Shake the spray bottle well before use.
How to use
Simply, shake the spray bottle before use. Spray the essential oils around your premises at least twice a day for better results.
Conclusion
You can now create long-lasting DIY essential oil room spray for yourself at home. In just a few easy steps you can make different essential oils spray that would help in cleansing the air. The sprays are very effective and kill all the impurities in the air. The fragrance of the oils makes an environment totally blossom with amazing smells. If you haven't tried the DIYs using essential oils yet then do try them today. They are amazing and chemical-free. The process of making essential oil spray is very easy and can be done in a few steps. Don't wait and make your own essential oil spray today.
FAQs
Q- Which is the best essential oil as a room spray?
Ans- Some of the best essential oils for room spray are Lemon essential oil, lavender, ylang-ylang, and jasmine essential oil.
Q- Are essential oils spray safe for pets at home?
Ans- Yes, the aroma of essential oils spray is completely safe for pets. There are no side effects or harmful aspects of the oils for the pets.
Q- Can we mix two or more essential oils for room spray?
Ans- Yes, absolutely you can mix as many essential oils together for enhancing the aroma of room spray all around the home premises.
You May Also Like
![]()
-
How to Make Rose Water at Home
How to Make Rose Water at Home: We can make rose water by concentrating rose petals with steam. Rose water is used as a natural fragrance, in place of chemical-filled perfumes. It originated in what is now known as Iran. Roses are a symbol of love, sensualness, and luxury. It is known as Rosa damascene in Latin. The honed aroma of roses is one of the most decipherable in the world. It is extensively popular in the beauty industry. Rose is used in everything from creams to colognes. Rose water is a liquid made from water pervaded with rose petals. It is one of the best ways roses can be used for well-being, beauty, and food. Rose water is a health and wellness essential. It is used in many ways, from room spray to a scented bath. Please refer to this article to know how to make rose water at home.
How to Make Rose Water at Home: Step-by-Step Guide
There are three ways to make rose water at home:
-
The Simmering Method
Prep the roses: Simmering is the easiest way to make rose water at home. First you need to detach the petals from the stems and fill at least half a cup of fresh petals.
Add petals and water to the pot: Immerse the petals with insufficient water to cover them. Anything added more can make the rose water diluted.
Turn the burner to the medium: Place the pot on the stove and bring the water to a seethe. Once it starts seething, cover and reduce to a lower setting. Let the leaves lose their colors and leave them for 15 to 30 minutes.
Strain the mixture: use a strainer to strain the mixture and separate the unuseful substituents.
Use a sealed container: You can use a spray bottle to store the rose water. It can be stored for even a month.
-
The Distilling Method
Prep the roses: Remove the petals from the stems.
Prepare the large pot: Place a small bowl in the center of a large pot. If the bowl isn’t raised enough to meet the pot’s limits, use another bowl or whatever heat-tolerant to lift it. This will act as an influence on the pot lid.
Keep petals and water: You need to put petals into the pot then add distilled water.
Put ice on top of the lid: For the condensation inside the pot, you should use some ice that can accelerate the steam.
Pour rose water: Now, turn off the heat and let the mixture cool before removing the lid. Make sure no more water drips into the bowl. Put the rose water into a jar.
Strain the mixture: Now the distillation method is done. It's time to strain the rose water collected around the bowl. Use a strainer and separate the rose petals from the liquid.
-
The Crushing Method
Prep the roses: Detach the stems and flowers until you get a half cup of petals. That will be sufficient for making rose water.
Make two piles: You should divide petals into two equal-size piles. Crush the first pile in the mortar and pestle to excerpt the juice. The second pile will be used later for more reliable coloring.
Transfer to a bowl: Place the crushed juice into a bowl. leave it for two-three hours so that the liquid gets thickened. Now, mix the remaining petals. Let it sit for an additional 24 hours at room temperature.
Place the mixture in a ceramic saucepan: The heat should be low and brought to a simmer. Once you see bubbles, remove them from the stove and pour the rose water through a strainer.
Put in a container: Leave the mixture in a jar for about two-three hours.
Different Ways of Using Rose Water
Here are the best ways of using rose water.
Face Mask: You can add some rose water to the face mask to get the extra hydration. Mix two tablespoons of rose water into your favorite face mask and mix it with the residual contents. Apply the face mask on your face to have a soothing effect.
Hair Mask: Rose water is great for your scalp and can do wonders for your moist locks. Spray rose water on your newly washed hair and top it up with a conditioner. It helps soothe the scalp from any crossness and can give your hair an expected shine.
Facial Toner: For every skin care lover, rose water is something they would have been looking for. They can use it as a toner for the Face. It gives a soothing effect.
Fragrance Mist: Natural fragrance is something that gives a great feeling. With its wonderful scent, rose waterworks is an inordinate substitute for natural fragrances.
Benefits of Rose Water for Skin
Some of the benefits of rose water are listed below.
Used for Calming Skin Irritation: Rose water has anti-inflammatory properties which can reduce soreness, annoyance, spots, and Eczema.
Controls Excess Oil and Maintains pH Balance: Rose water has a mid pH level of 5.5 that helps to restore the skin’s natural pH, compared to regular soaps.
Highly Hydrating: Rose water is a holy treasure essential for people with dehydrated skin. It assists your skin be hydrated and moisturized.
Heals Wounds and Scars: Rose water can also be applied to wounds and heals effectively.
Anti-aging Properties: Rose water has anti-aging properties. If applied to the skin directly for some time, it makes the skin glow.
Treats Mild Scalp Infections and Reduces Dandruff: It is found to be effective on dandruff too. You can use rose water to treat mild scalp infections.
Decreases Under-Eye Puffiness: Facing the screens of laptops and mobiles is very common today. So, to reduce the under-eye puffiness, you can use rose water.
Conclusion
Rose water is a natural source of so many things. You can use it for your skin, hair, dark circles, and scalp infections. The list of uses and benefits of rose water is very long. Most people believe in using natural and homemade rose water. For that purpose, you can refer to this article. We have mentioned every single detail in this article about how to make rose water at home. You can buy the ingredients and rose water from Veda Oils to have a natural and long-lasting effect. Since its inception, VedaOils have been there for the customers to have quality products.
FAQs
Q. When can you use rose water for skincare?
A. You can use it anytime for your skin care routine.
Q. For how long can you store homemade rose water?
A. You cannot store the homemade rose water for a very long time.
Q. Can all age groups people use rose water?
A. Yes, rose water is easy and safe to use by people of all age groups.
Q. Can rose water whiten skin?
A. Yes, you can use rose water to get a brighter skin tone.
Also Check:
How to Make Foaming Hand Soap at Home
How to Make Cocoa Butter Lotion at Home
How to Make Lip Balm at Home